Restarting a project is different from resetting a step on a Guided Project. “Restart project” can be used to take the user to Step 1 of a Guided Project and delete all progress in that particular project. Whereas “Reset Step” is used to delete the progress and start over on the current step only.
To reset the progress of a step, you can do the following:
Click the project’s title at the top of the code and output panel.
Click the reset step button below the current step title.
A confirm dialog box will appear. Click the “Reset step” button to continue.
Here’s an animation showing how you can do this:
Please note that you can only reset the current step of the project. Additionally, only code steps can be reset; video and text info steps cannot be reset.
Empathy is a crucial skill that can help students develop meaningful relationships, understand diverse perspectives, and navigate complex social situations. In today’s world, where technology is increasingly integrated into education, it is essential to explore how technology can be used to foster empathy. In this blog, we will discuss the role of empathy in education and how technology can be used to foster it.
Promoting Cultural Understanding
EdTech can help promote cultural understanding by exposing students to diverse perspectives and experiences. Through virtual field trips, online cultural exchange programs, and language learning apps, students can learn about different cultures and develop empathy for people from different backgrounds.
Encouraging Collaboration and Communication
EdTech can encourage collaboration and communication, which are essential components of empathy. Through online platforms like discussion forums, video conferencing, and collaborative tools, students can work together and learn from each other. This can help them develop empathy by understanding different perspectives, sharing ideas, and finding common ground.
Creating Immersive Learning Experiences
EdTech can create immersive learning experiences that help students understand complex social issues and develop empathy for others. Through virtual reality, simulations, and interactive storytelling, students can explore different perspectives, empathize with others’ experiences, and develop a deeper understanding of the world around them.
Providing Personalized Learning
EdTech can provide personalized learning experiences that help students develop empathy. By tailoring learning to individual needs and preferences, students can learn in a way that works best for them. This can help them develop empathy by recognizing and understanding their own emotions and the emotions of others.
Using Data for Social Emotional Learning
EdTech can use data to measure and support students’ social and emotional learning. By collecting data on student performance, behavior, and emotional well-being, educators can identify students who may need additional support and provide targeted interventions. This can help students develop empathy by addressing their emotional needs and helping them understand and empathize with the emotions of others.
In conclusion, empathy is an essential skill that can be fostered through the use of technology in education. EdTech can promote cultural understanding, encourage collaboration and communication, create immersive learning experiences, provide personalized learning, and use data for social emotional learning. By using technology to foster empathy, educators can help prepare students for success in a diverse and complex world.
I would like for my students to create a full (multi-page) website from the HTML/CSS/JavaScript sandbox (or another blank sandbox), but I can’t figure out how to create new pages in that sandbox. I could have them use the multi-page website sandbox, but so much is already done for them in that template. Any suggestions?
Thanks for reaching out! I understand that you want to make the sandbox a little more challenging for the students. What I can suggest is that once you saved the sandbox template, make edits (i.e remove some codes that you want your students to create themselves) to it. You can also add comments to the sections you want your student to modify or develop. You can share the sandbox link to your students and have them “make a copy” of it so the sandbox template will be saved onto their accounts for them to further customize and create their full websites.
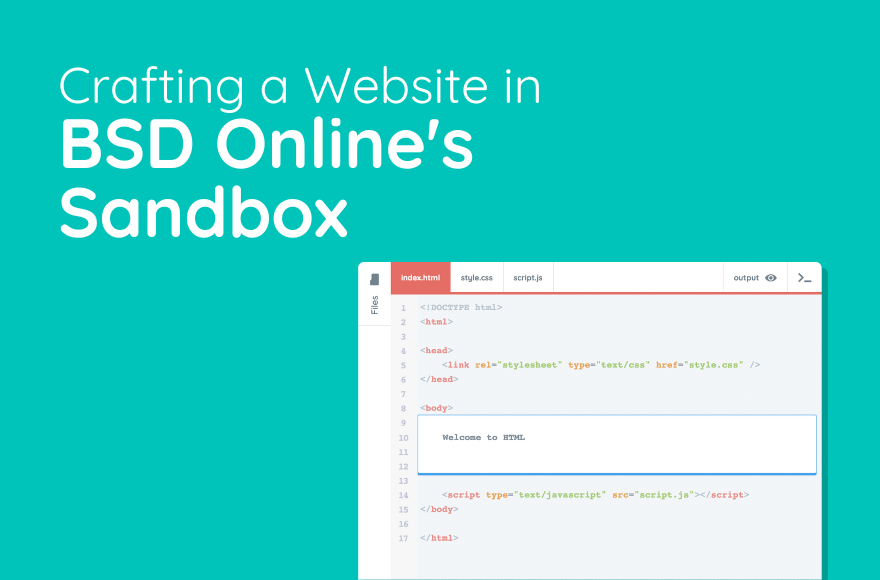
I hope all is well! You can certainly achieve a multi-page website in BSD Online’s sandbox! The trick is for students to link multiple sandboxes together. Effectively, each page of the website (home, about, contact, etc.) will be a separate HTML/CSS/JavaScript sandbox.
When students create the links in HTML, they’ll want to use the sandboxes’ share links, as opposed to the edit links. Please see this linked guide on generating sandbox share links 4.
Whether you’re a budding developer, a curious learner, or an educator seeking to impart valuable skills, grasping the basics of how websites are built is a fundamental step. This brings us to the core of web development: HTML, CSS, and JavaScript. These three languages are the pillars that support every website you visit, each playing a unique and crucial role in bringing web pages to life. Let’s dive into what each of these languages does and why they are so important.
What are They?
HTML, CSS, & JavaScript are the three basic languages that make up a website.
To describe the function of each language, imagine a webpage as a house:
HTML is the structure of the house. It determines what content is on the webpage, and where they belong. In our analogy, HTML would decide things like how many bedrooms are in the house and how many tables and chairs go in the dining room.
CSS is how the house looks. It declares the contents’ size, shape, position, and more. If a webpage is a house, CSS would determine things like the size of the living room, what color the chairs are, and whether the dining room floor is carpet or hardwood.
JavaScript is how a house reacts to its owners’ actions. JavaScript handles the interactive elements of a webpage like buttons and forms and uses a set of rules to determine what happens next. JavaScript uses logic to tell the webpage how to respond to user interaction, similar to how a house determines which lights to turn on/off when a flip is switched.
Why HTML, CSS, & JavaScript?
But why did we choose HTML, CSS, and JavaScript for teaching code? The idea of learning just one programming language may seem hard enough, much less three all at once.
It seems daunting at first, but our decision to focus on web development solves many issues that other computer science curricula struggle with.
Accessible to Everyone
Many other languages require special compilers and environments before they can be run on a computer, whereas HTML, CSS, and JavaScript only require a web browser. This ease of execution makes BSD Online easily accessible to anybody with an internet connection, whether they are on a school computer or a personal device.
A Visual Approach
Languages like Java & C++ don’t possess simple means to create graphics. Since webpages are inherently visual, HTML and CSS are a quick and easy way to create eye-catching projects. For many students, the ability to visualize code is essential to understanding the concepts being taught.
Seamless Classroom Integration
As web development languages, HTML, CSS, & JS make Computer Science easy to integrate with other subjects; with just a few weeks of coding experience, students would be equipped to create web-based projects for any class, from Spanish to AP Biology. As a technological artifact, code has the potential to go beyond the confines of a computer science class; web languages offer a clear path towards the kind of ubiquity BSD Online seeks to achieve.
In conclusion, HTML, CSS, and JavaScript form the trifecta of web development languages that not only pave the way for creating dynamic and visually appealing websites but also ensure that learning these skills is accessible and integrated into broader educational goals. By focusing on these languages, BSD Online not only demystifies the process of web development but also opens up a world of possibilities for students and learners across disciplines. As we move forward in an increasingly digital world, the knowledge of HTML, CSS, and JavaScript becomes not just valuable but essential for anyone looking to understand or contribute to the vast expanse of the internet.
Students can share their sandboxes with everyone. Did you know that they can also share their whole portfolio? Sharing their whole portfolio means they can showcase all their sandboxes in one link! This can be used in term-end submissions or even when they are applying for a job.
But first, what is a portfolio? Please watch this short video about what BSD portfolio is about:
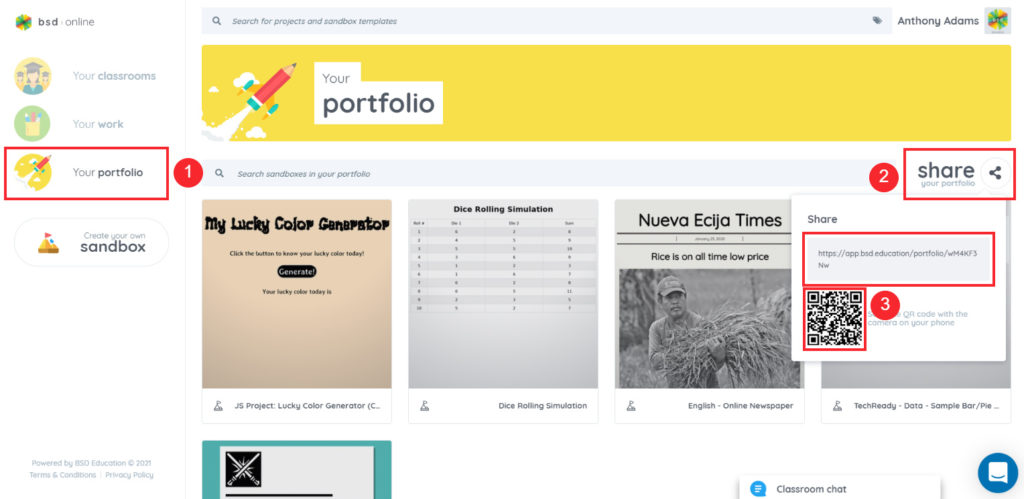
Sharing your portfolio can be done by following these steps:
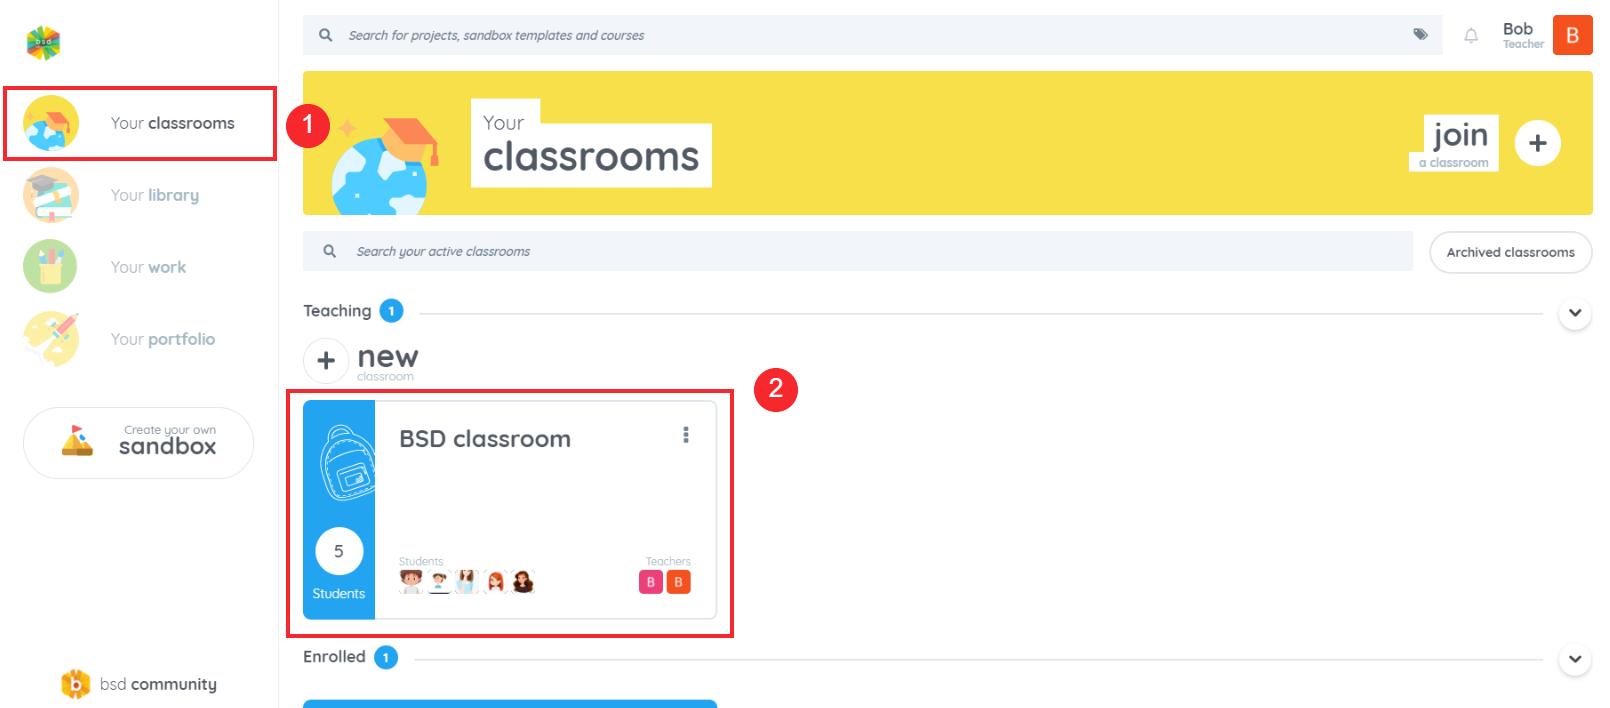
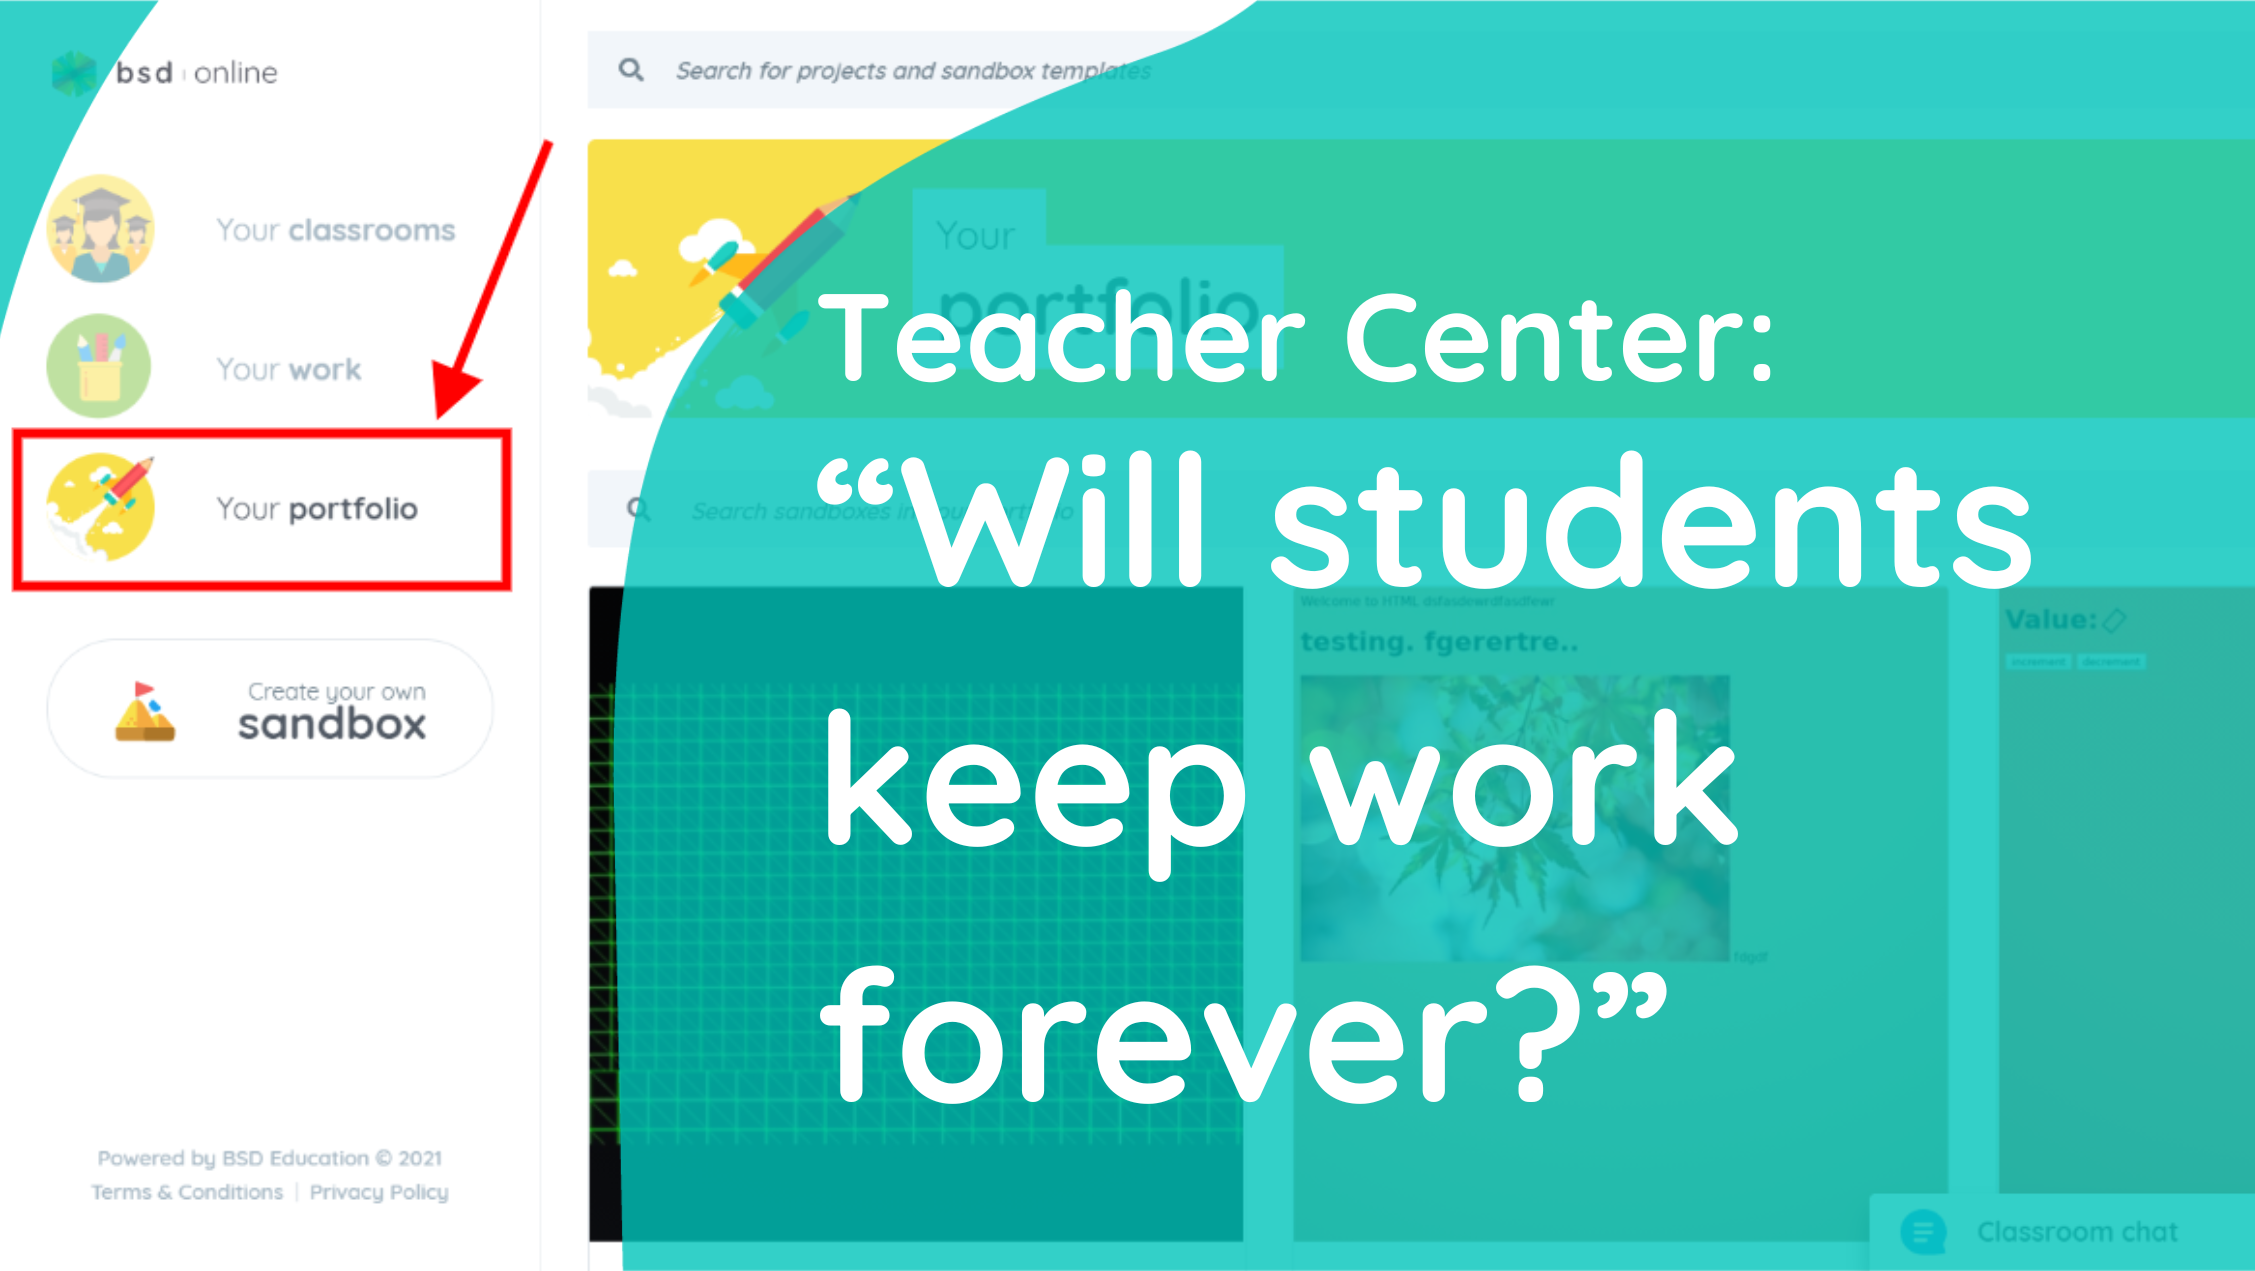
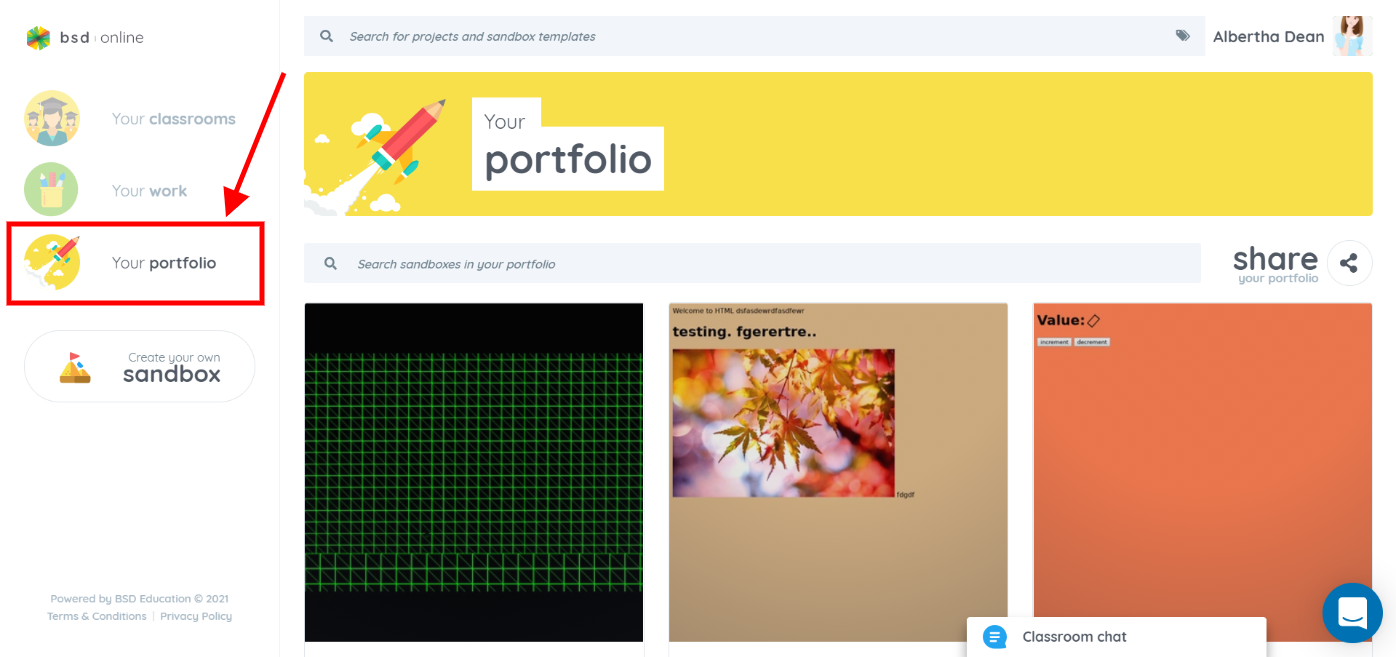
On your homepage, click on “Your portfolio” from the left panel.
On the right hand side of the screen, you’ll see a button that says “share your portfolio”.
You have 2 ways to share your portfolio, either via a unique share link or a QR code.
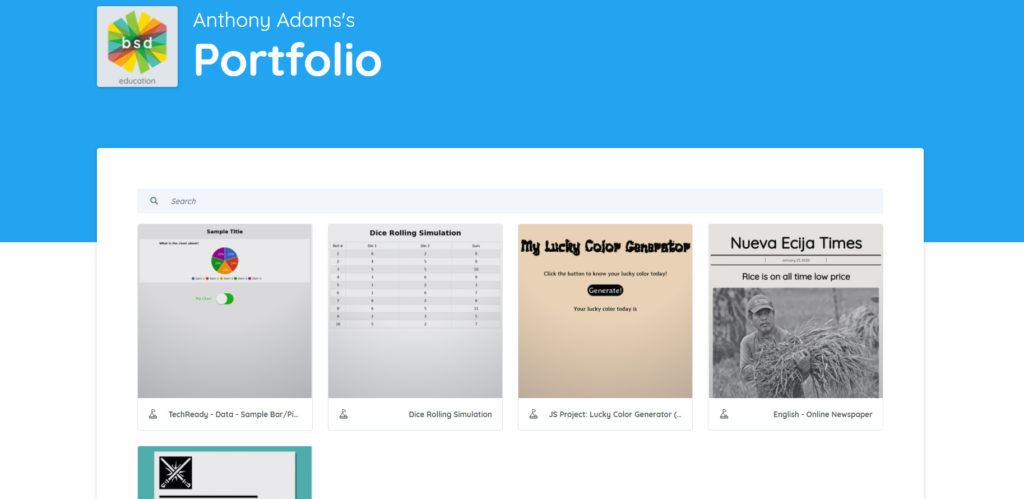
Copy the link and share it with anyone you want to share it with. This is an example of what they will see:
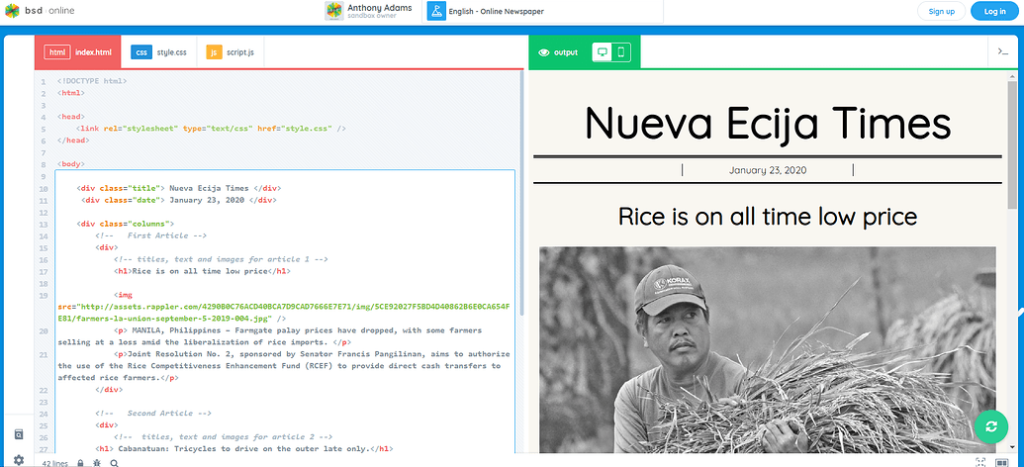
People who view your portfolio can also see the codes you used by clicking on the sandbox they want to view.
If you have questions or concerns, let’s talk! Feel free to send an email to support@bsd.education or “start a conversation” through chat support!
The use of video to deliver content to students online has become increasingly popular. Video has proven to be a highly effective educational format especially for students who learn more with graphics or visuals rather than texts, in addition, videos are more appealing than the written format. Want to include learning materials in a video format? Be it from YouTube, Vimeo or other online video hosting sites, or even a video you created yourself while performing your lecture and others. Videos in addition to your existing teaching materials can definitely make learning more effective.
To create a video step:
First, go to the classroom you want to add your video step.
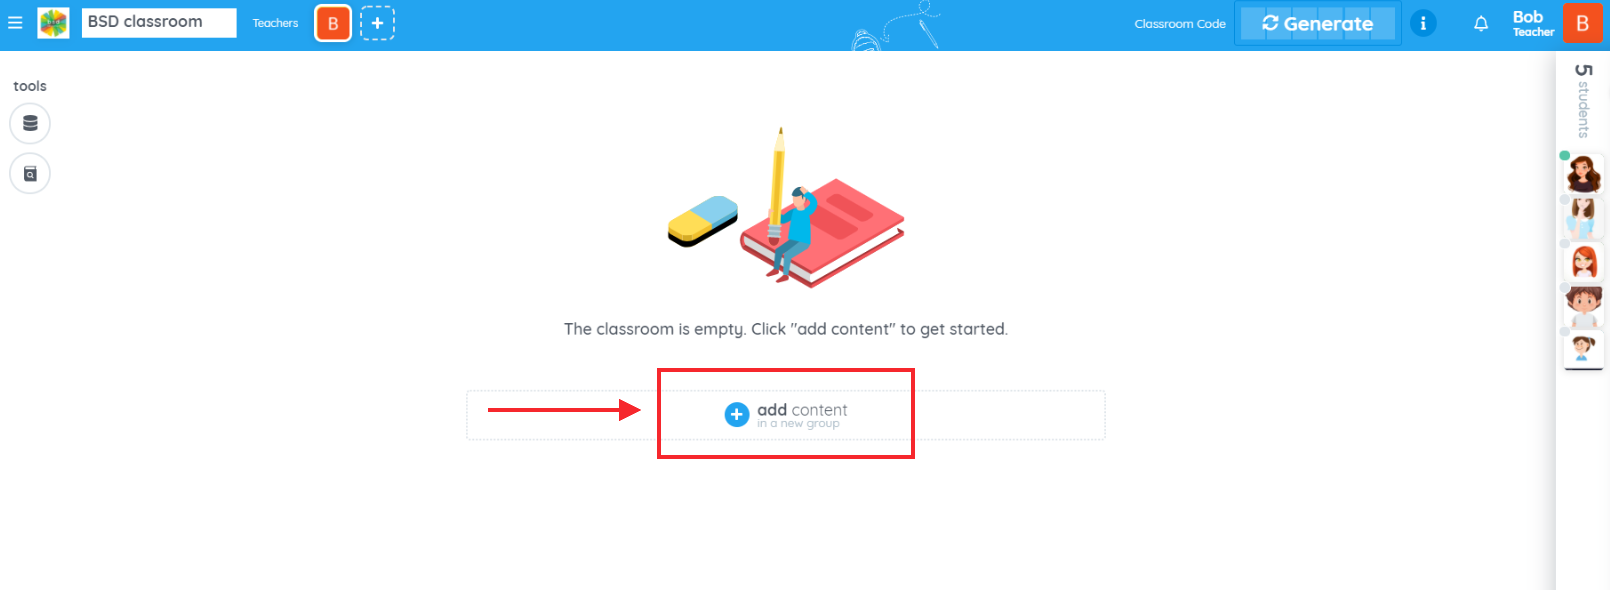
Once you are inside your classroom, click on the plus icon “+” if you have an empty classroom.
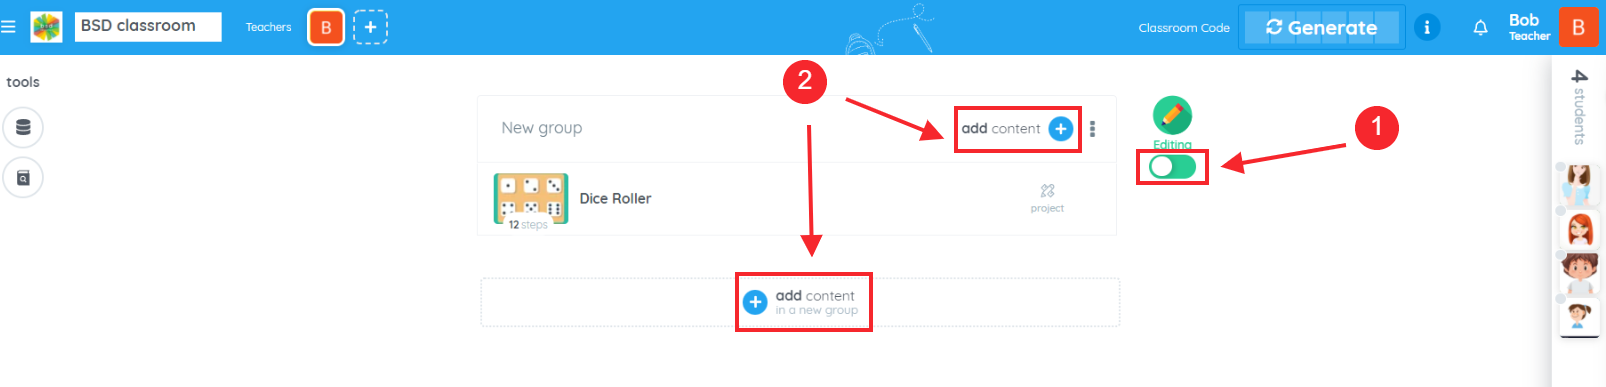
Or toggle the “Teaching” slider to “Editing” mode to unlock the classroom content, if you already have contents and materials added previously.
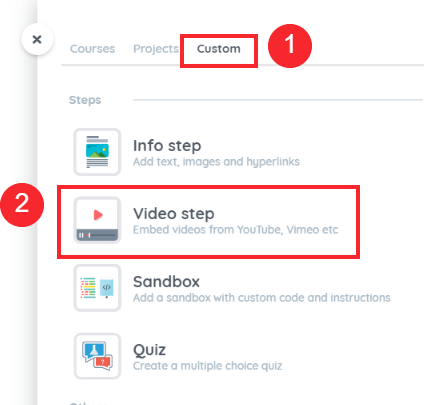
After clicking on the add content button, a sliding menu should appear on the right side of your classroom. Select “Custom” then Video step.
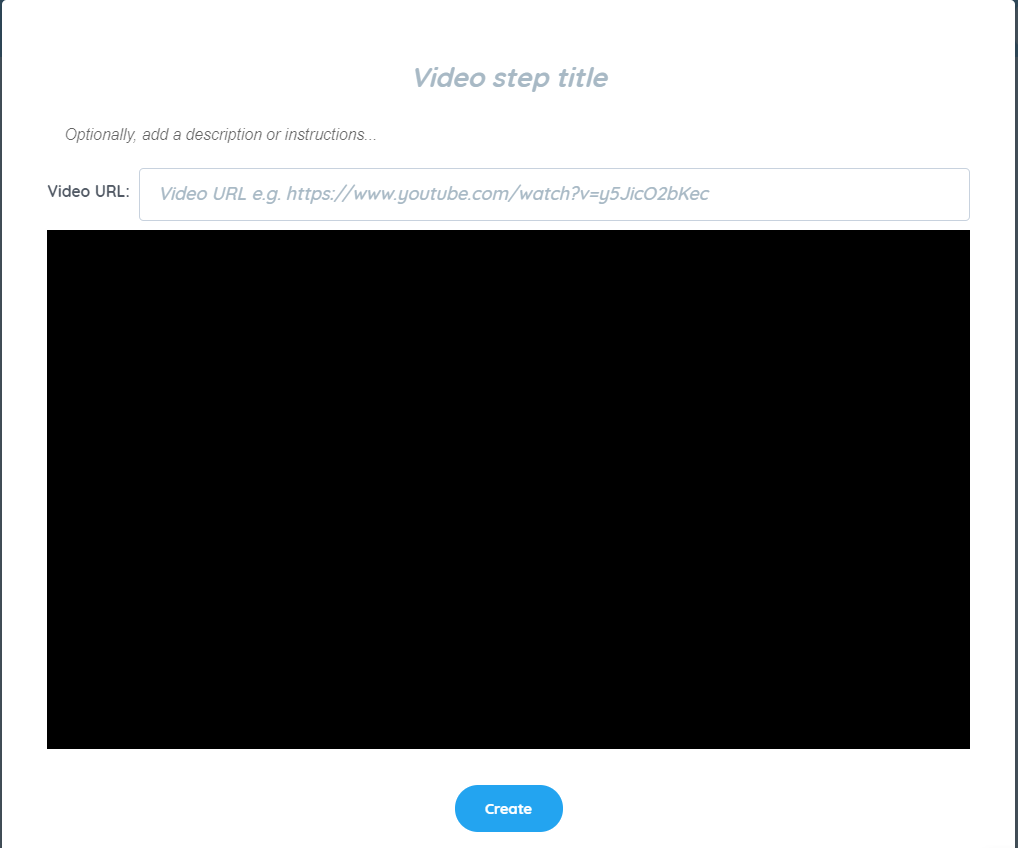
This pop-up box will appear. This is where you input your video’s title, description and the URL or the link of the video where it is sourced.
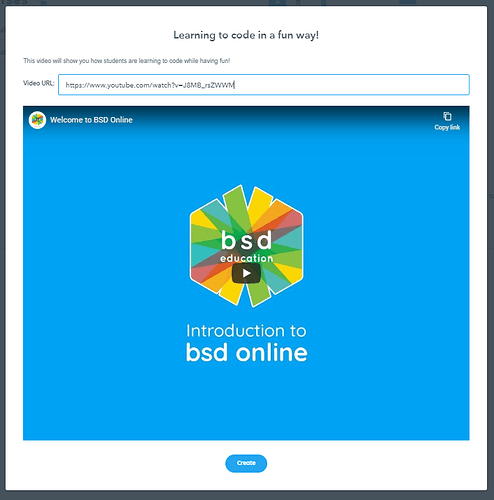
Once you have all the information fulfilled, here’s a sample of what it looks like. You can now click on the “Create” button to save your Video step.
Don’t forget to to re-lock your classroom content to avoid accidental and unwanted changes.
And you now have your video step ready for students to watch and learn! If you have questions or concerns, let’s talk! Feel free to reach out to us through support@bsd.education or “start a conversation” in chat support!
Teaching the same students with different courses? Or teaching the same course to a different group of students? Creating a new classroom can be a little tedious. BSD created an easier and time efficient way of creating a new classroom for your teaching needs. Classrooms can now be duplicated and have the option to copy the list of students and contents too! This is how you do it:
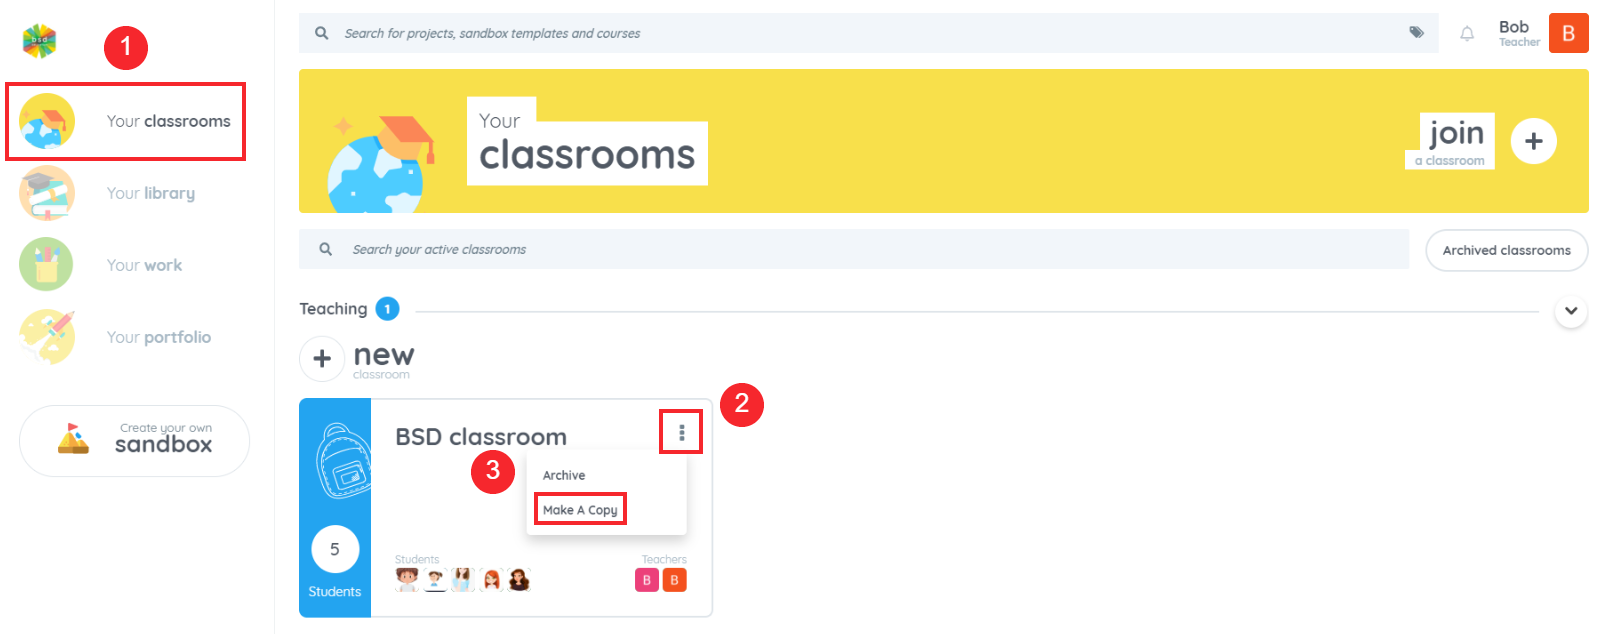
When you are in the Manage classrooms tab, click on the ellipsis (three dots) and click on “Make A Copy”.
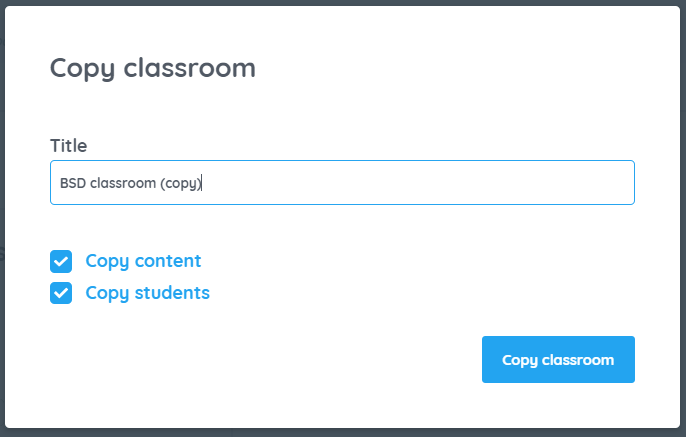
A pop-up window will appear and will have the customization that you need for your new classroom. You have the option to rename the classroom (recommended to avoid confusion) and 2 checkboxes to copy the contents and students from the original classroom.
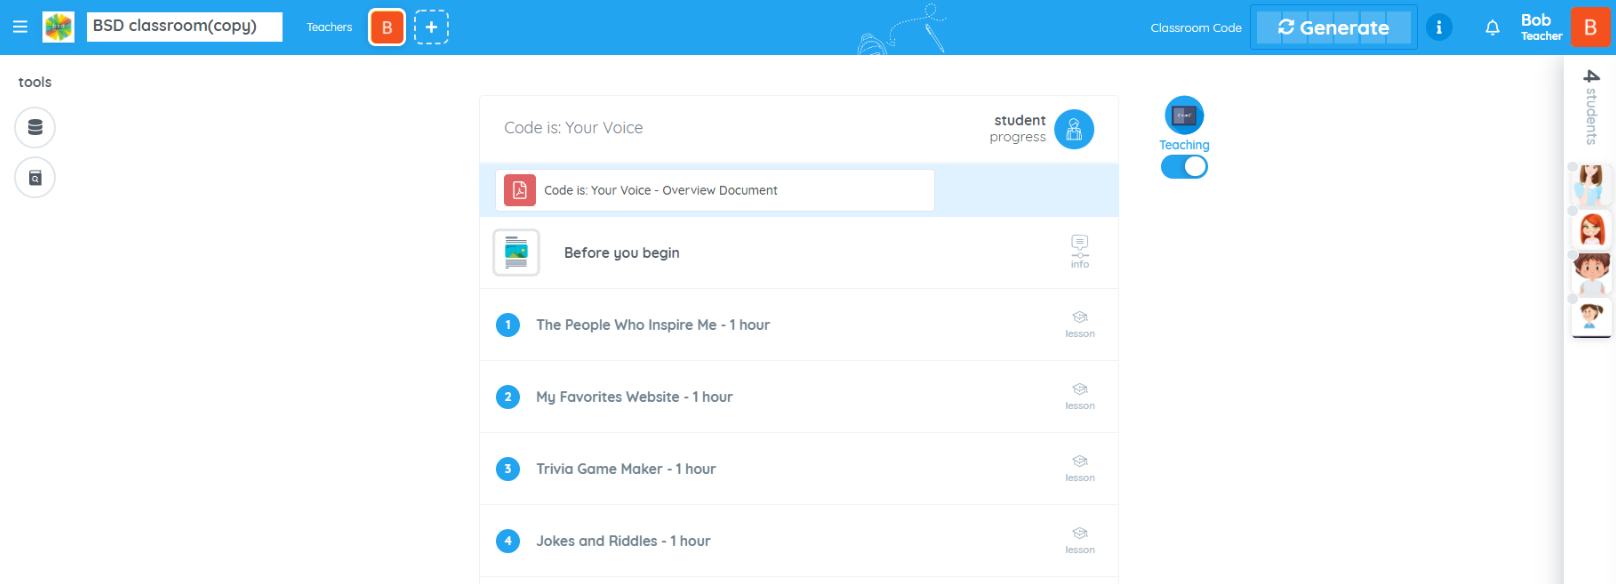
After clicking on the “Create classroom” button, you will go straight inside the classroom where you can make your desired changes like adding/removing contents and students. You can also rename the classroom here if you’re not able to on step 2.
If you have questions or concerns, let’s talk! Feel free to send an email to support@bsd.education or “start a conversation” through chat support!
This is a great question! In this day and age, ensuring that your students build their learning journey through a portfolio is more important than ever. With each Guided Project and Sandbox students create on BSD Online, it is automatically stored inside “Your Portfolio”.
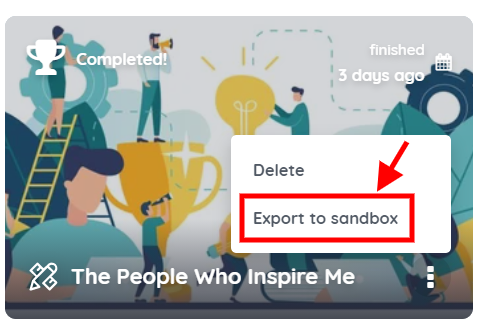
If your student leaves the school and/or completes their schooling, they will still have access to all the Sandboxes they have created and they are free to share this with friends, family, prospective schools, and employers. For this reason, make sure your students “Export to sandbox” and make it their own after they complete each Guided Project
So, in short, yes! Students will be able to keep their work forever
With the rise of distance learning around the globe, we’re working with many non-coding teachers who are adopting BSD Online tools alongside LMS platforms like Google Classrooms. I’ve included 3 of the most common use-cases below:
1. Custom, sequenced presentation of classroom materials One nice feature of BSD Online’s classroom dashboard is that it allows teachers to present their existing material as a cohesive experience. By uploading your own content to a classroom 5 on BSD Online, students can transition seamlessly from one resource to the next. As opposed to with a shared folder of documents, you have control over the sequence in which your students access the information.
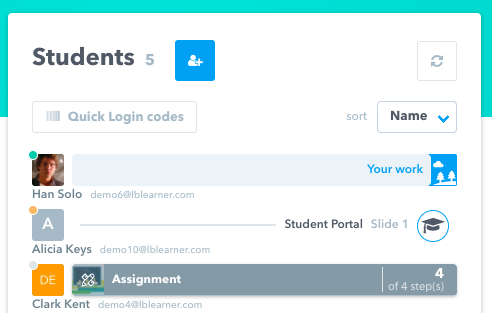
2. Tracking student activity and progress Once your material is hosted on BSD Online, you will be able to track exactly where your students are in real time. The image below shows 3 sample students:
The green, yellow, and gray dots next to the student avatar correspond with active, inactive and signed out respectively.
Each progress bar shows the students’ current positions in real time. Han is not in the classroom, Alicia is on page 1 of a custom PDF, and Clark has finished an assignment.
3. Linking to external software Finally, many teachers use BSD Online a centralized hub for linking to various online resources. Feel free to check out this support video 8 for a detailed walkthrough of this process as well as a template classroom portal that you can use.
“I already built the student portal. My students do not want to use it. They feel that logging into BSD is an unnecessary step since they already have direct access to Google classroom. What else can I do with BSD?”
With the rise of distance learning around the globe, we’re working with many non-coding teachers who are adopting BSD Online tools alongside LMS platforms like Google Classrooms. I’ve included 3 of the most common use-cases below:
1. Custom, sequenced presentation of classroom materials One nice feature of BSD Online’s classroom dashboard is that it allows teachers to present their existing material as a cohesive experience. By uploading your own content to a classroom 5 on BSD Online, students can transition seamlessly from one resource to the next. As opposed to with a shared folder of documents, you have control over the sequence in which your students access the information.
2. Tracking student activity and progress Once your material is hosted on BSD Online, you will be able to track exactly where your students are in real time. The image below shows 3 sample students:
The green, yellow, and gray dots next to the student avatar correspond with active, inactive and signed out respectively.
Each progress bar shows the students’ current positions in real time. Han is not in the classroom, Alicia is on page 1 of a custom PDF, and Clark has finished an assignment.
3. Linking to external software Finally, many teachers use BSD Online a centralized hub for linking to various online resources. Feel free to check out this support video 8 for a detailed walkthrough of this process as well as a template classroom portal that you can use.
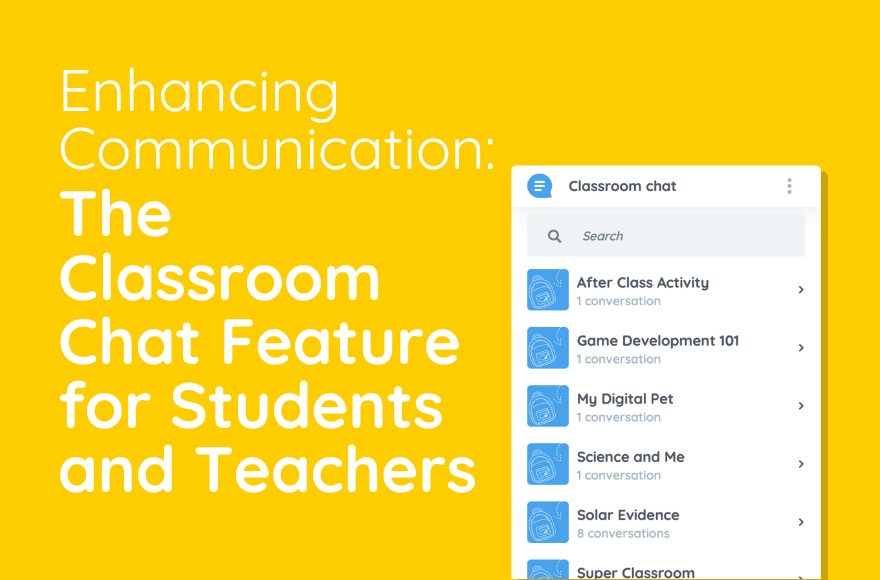
Communication makes learning easier and efficient, it helps students achieve their goals, strengthens the connection between students and teachers, and creates an overall positive experience. However, in this incredibly challenging year where in-classroom teaching and learning may not be possible and virtual or blended learning becomes the best alternative, we want to make sure that communication will be maintained and easy for both teachers and students. We introduce the BSD student/teacher classroom chat!
This new feature enables teachers to communicate with their students inside the classroom, eliminating the need for a third-party communication channel in the process. This new feature will only allow teacher to student and student to teacher communication. Here’s a how it works:
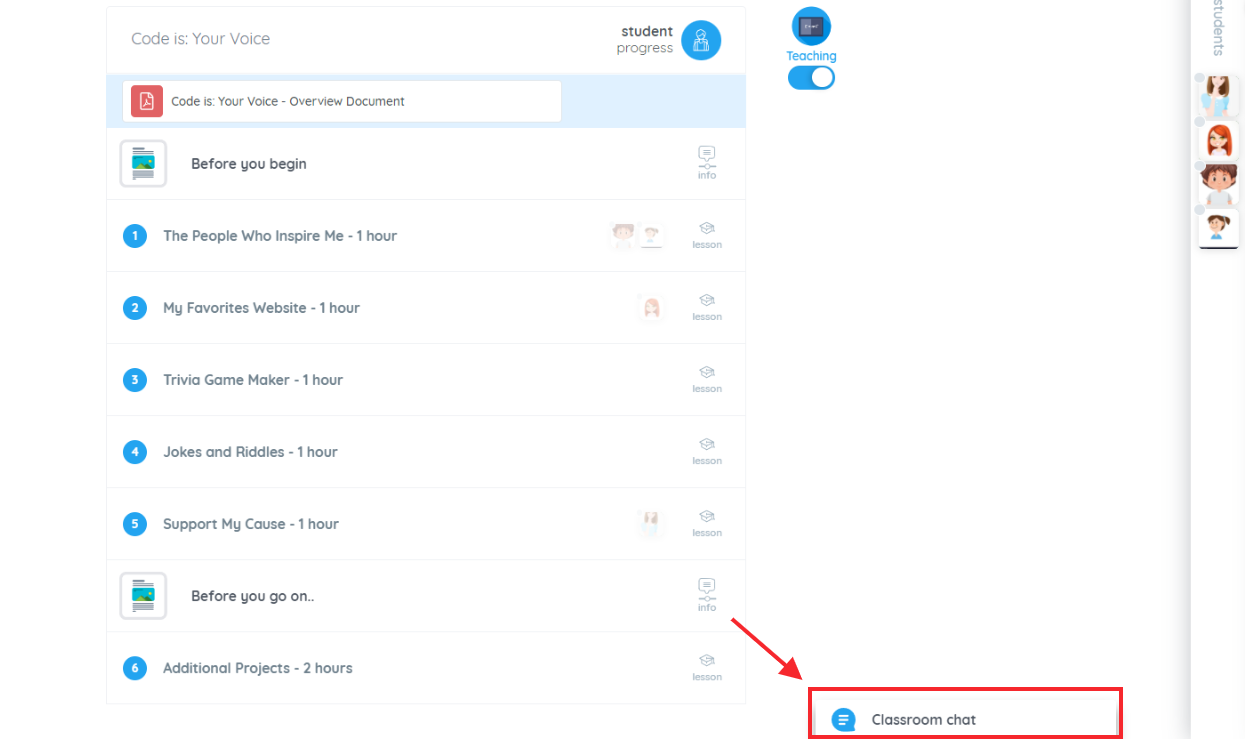
The Chat box
The chat box is located on the bottom right side of the screen. It will always be available wherever you are on the platform for ease of access anytime a student sends in a message. Click this box to see all classrooms.
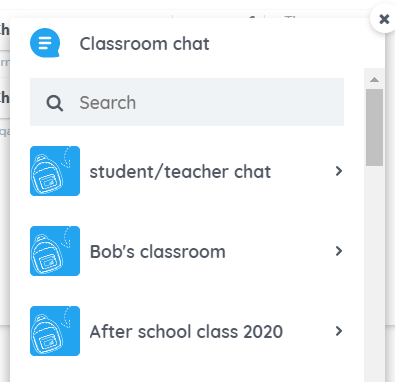
Classroom chat
All classrooms that you created or a part of will be listed here, including classrooms from other organizations if you have any other affiliations.
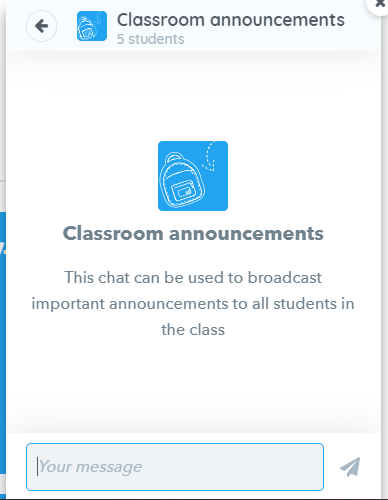
Classroom Announcements
This feature works as a group message to send a general message or class announcement once inside a classroom chat. All students inside the classroom will receive the message but if ever students responded, only the teacher will receive it as a personal message.
Example:
All 5 students will receive the same message from the teacher.
Students will receive this message. Classroom announcement logo will show up to indicate that the message was meant for the whole class.
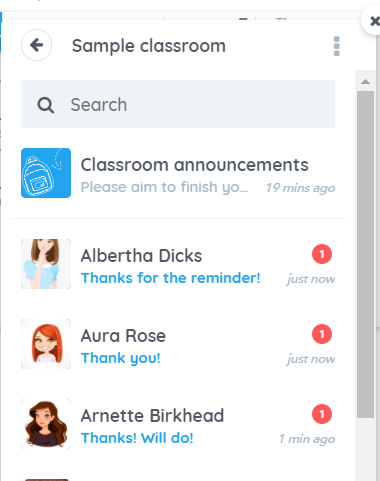
When a student responds to a Classroom announcement, the teacher will receive it like a personal message.
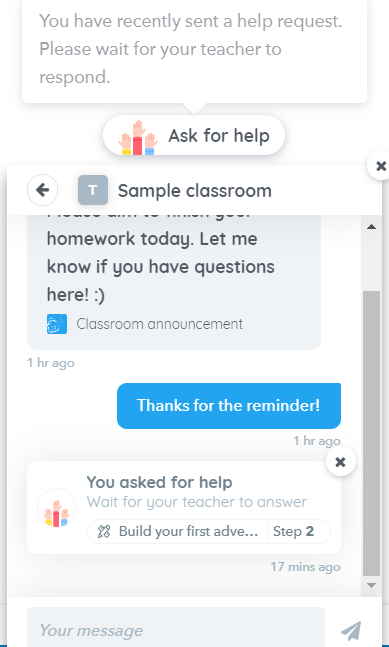
Aside from communication, a student can also send an Ask for help through chat! This will enable the students to send in the exact step of a project that they have questions with. Whenever a student is on a project, they will have an option to click the Ask for help button and it will send a notification to the teacher through chat.
We hope you find this new feature helpful and we are excited for you to experience using this chat feature in your next class! If you have any questions or feedback about this new feature, please feel free to send in a message through our support channels support@bsd.education and chat!